


This document provides information on how to navigate and use the License Cost page of Contract Management under the Open iT Analysis Server Administration tab.
Introduction #
The License Cost page contains various functionalities to manage the list of applications with cost under a specific contract for contract management. The page is only visible to users with Administrative rights to Open iT Analysis Server.
Follow these instructions to navigate to the page:
- Open the Open iT Analysis Server web interface using a web browser.
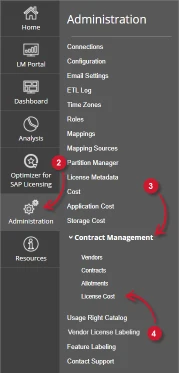
- Hover the cursor over Administration tab. Wait till the sub-tabs appear.
- Click the Contract Management tab to display all the sub-tabs.
- Click the License Cost sub-tab.

Figure 1. Analysis Server Administration: Contract Management – License Cost – Navigation
The License Cost page should be displayed.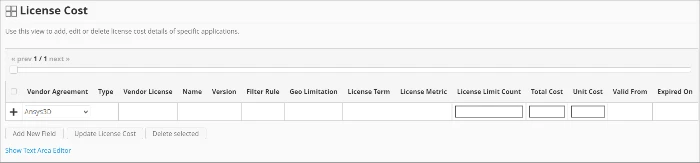
Figure 2. Analysis Server Administration: Contract Management – License Cost Page
Use the following descriptions of the columns for proper configuration:
- Vendor Agreement – the specific Contract the application cost belongs. The list is available when there are entries on the Contracts page
- Type – the specific type of application
- Vendor License – the vendor name of the application
- Name – the specific name of the application
- Version – the specific version of the application
- Filter Rule – the specific criteria used to filter the included data
- Geo Limitation – the geological scope of the application cost
- License Term – the criteria used as basis for license inclusion
- License Metric – the criteria used as a basis for computing license usage consumption. The following values are accepted:
- DU-1H – Distinct User per Hour
- DU-1D – Distinct User per Day
- DU-1M – Distinct User per Month
- DU-1Q – Distinct User per Quarter
- DU-1Y – Distinct User per Year
- DH-1H – Distinct Host per Hour
- DH-1D – Distinct Host per Day
- DH-1M – Distinct Host per Month
- DH-1Q – Distinct Host per Quarter
- DH-1Y – Distinct Host per Year
- License Limit Count – the number of licenses allowed for the application
- Total Cost – the total cost of the application computed as the product of total usage and unit cost
- Unit Cost – the cost of the specific application
- Valid From – the start date of validity of the allotment
- Expired On – the end date of validity of the allotment
Requirements #
The following are the required things to consider to properly utilize the License Cost page in Open IT Analysis Server.
- SQL database is successfully created.
- Enable Contract Management using the the Configuration page.
- Added Contracts using the Contracts page.
- List of license applications with cost details.
- Prepared file containing all license applications with cost when using the Text Area Editor.
- Administrative rights of the current web user.
Adding Record #
Follow these instructions to add a license cost entry:
- In the License Cost table, choose among the available Vendor Agreement.
- Click the Type column. This should transform into a textbox. Provide the specific application type.
- Repeat the steps with the other columns – Vendor License, Name, Version, Filter Rule, Geo Limitation, License Term, License Metric, License Limit Count, Total Count, and Unit Cost.

Figure 3. Analysis Server Administration: License Cost- Adding Record - Choose the date range for the validity of the application cost.
- Click the add symbol (+) located at the first column of the row.
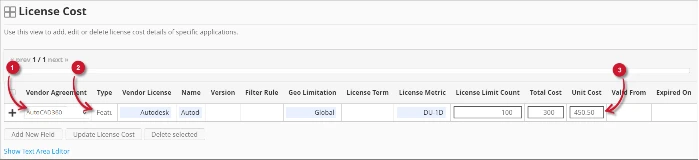
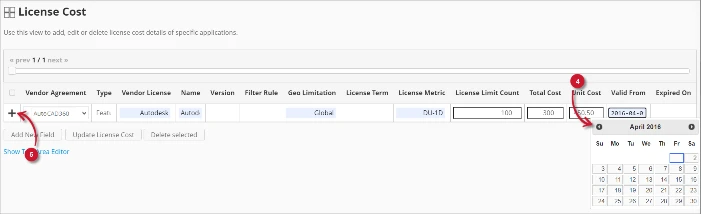
Figure 4. Analysis Server Administration: License Cost – Adding Record
The list of license cost should include the newly added item.
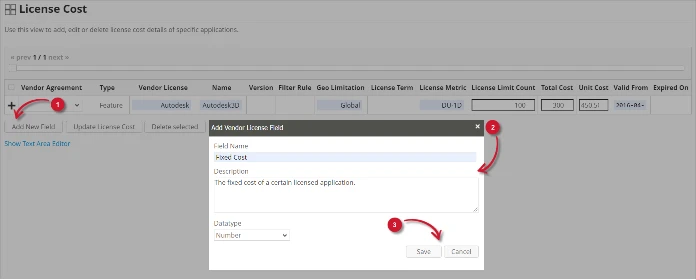
Adding a New Field #
Follow these instructions to add a new column for License Cost details:
- At the bottom of the License Cost table, click the Add New Field button.
The Add Vendor License Field dialog should appear. - Provide the following details.
- Field Name – a descriptive name of the field
- Description – a brief description to describe the field
- Datatype – the type of data the field accepts
- Click Save to continue.

Figure 5. Analysis Server Administration: License Cost – Adding New Field
The License Cost table should include the newly added column.
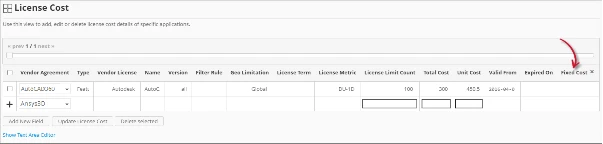
Figure 6. Analysis Server Administration: License Cost – Added New Field
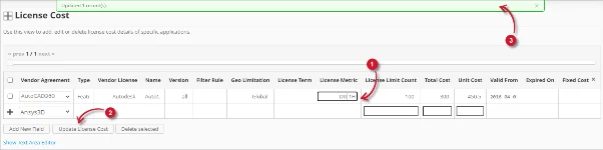
Updating a Record #
Follow these instructions to update a specific record:
- In the License Cost table, click the value of the column to update. This should transform to a textbox.
- Click the Update License Cost button at the bottom of the License Cost table.
- A notification message should appear at the top of the page showing the status of the update.

Figure 7. Analysis Server Administration: License Cost – Updating Record
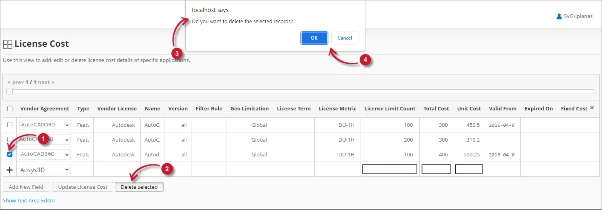
Deleting Record #
Follow these instructions to delete record(s) from the License Cost table:
- Click the corresponding checkbox of the record to be deleted.
- Click the Delete selected button at the bottom of the table.
- A confirmation message should appear.
- Click Save to continue.

Figure 8. Analysis Server Administration: License Cost – Deleting Record
The License Cost table should automatically be updated.
Text Area Editor #
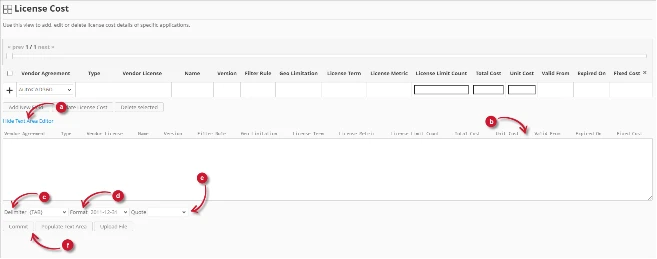
Figure 9. Analysis Server Administration Text Area Editor Details
Text Area Editor Details #
The text area editor is another way to add, edit and delete records in the list. The editor has the following components:
- Toggle link – toggles the display of the text area editor.
- Text Area – area where to paste and manipulate the records.
- Delimiter – the character to use as separator for each item in a record.
- Format – the format to use for dates.
- Quote – quotation marks to use to separate each item in a record.
- Commands:
- Commit – save the changes made in the text area.
- Populate Text Area – retrieve all the records from the table and display it in the text area.

Figure 10. Analysis Server Administration Using Text Area Editor
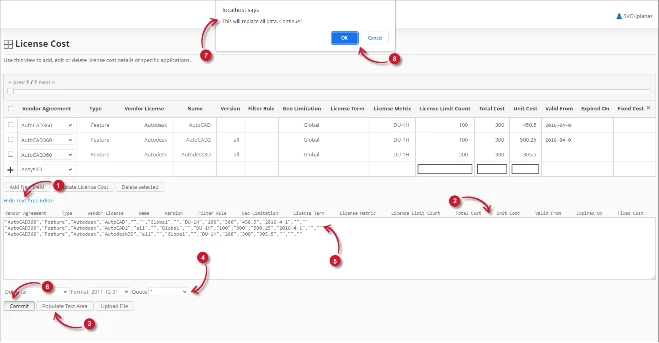
Using Text Area Editor #
Follow these instructions to use the text area editor:
- Click the toggle link Show/Hide Text Area Editor.
The Text Area Editor should be displayed. - Click the Populate Text Area button. The text area editor should be populated.
- Modify the records as desired. Use the components for Delimiter, Format and Quote.
To add a record, simply add a new line.
To delete a record, simply delete the entire row of the record. - Click Populate Text Area to apply the selected formats. Notice that the selected delimiter, format and quote should be applied in the text area editor.
- Click the Commit button.
A warning message should be prompted to confirm the application of the changes. - Click OK to continue.
The list should automatically be updated.
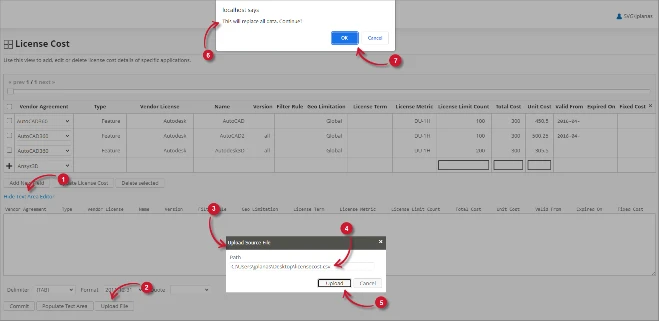
Uploading a Source File #
Follow these instructions to upload a prepared source file of License Cost details:
- Click the Toggle Link of the Text Area Editor.
- At the bottom of the page, click the Upload File button.
- The Upload Source File dialog should appear.
- Provide the valid path of the source file. The UNC path (\\path_to_file) is accepted.
- Click the Upload button to continue.
- A confirmation message of the upload process should appear.
- Click OK to continue.

Figure 11. Analysis Server Administration: License Cost – Upload File
Troubleshooting #
This part provides the possible work around for a known issue in the License Cost page.
Error page displayed when accessing not in localhost #
There will be times when accessing the License Cost page remotely or via hostname, it displays an error page.
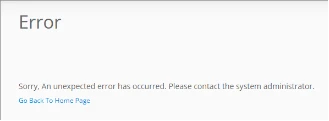
Figure 12. Analysis Server License Cost Page Troubleshooting: Error page displayed
Use the following suggestions to troubleshoot this issue:
Check for Web Browser Console Errors #
Follow these instructions to check for errors in the web browser console:
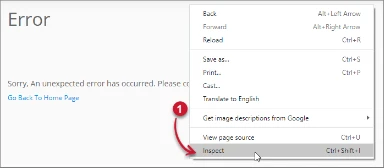
- In the License Cost page, right click anywhere inside the page and choose Inspect.

Figure 13. Analysis Server License Cost Page Troubleshooting: Error page displayed – Inspect
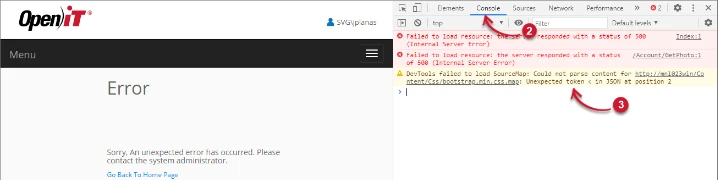
The Developer Tools should appear. - Choose Console from the available tabs of the tool.
The console lists web browser transactions including errors.
Figure 14. Analysis Server License Cost Page Troubleshooting: Error page displayed – Console - Errors in the console may sometimes be too technical, for immediate response, send the error detail to support@openit.com.
Access the website through localhost #
To see the server’s real error message, go to the machine hosting the Open iT Analysis Server, then access http://localhost on a browser. The real error message should be displayed.