





Introduction #
Centralized License Integration and Management System (CLIMS) #
Centralized License Integration and Management System (CLIMS) is an advanced system that provides administrators a centralized portal for the administration and management of license files, options files, and license servers.
CLIMS allows administrators to manage and control all license servers across the enterprise with just a single interface and can be used alongside LicenseAnalyzer to manage and optimize the use of expensive engineering applications effectively.
Installation Requirements #
Server Requirements #
Hardware Requirements #
| Hardware | Minimum | Recommended |
|---|---|---|
| RAM | 8GB | 16GB |
| Disk | 10GB | 50GB |
| CPU | 1GHz | 3GHz |
| Cores | 2 | 4 |
Software Requirements #
Operating System #
| Operating System | Version | Architecture/s |
|---|---|---|
| Windows Server | 2008 R2 Service Pack 1 or later | x64 |
| Windows 7 | 7 Service Pack 1 or later | x64 |
| Windows 8 | 8.1 or later | x64 |
| Windows 10 | Version 1607 or later | x64 |
Important: The CLIMS server is supported on Windows platforms only.
ASP.Net Core #
Open iT Admin Portal, Application Launcher, and CLIMS require APS.NET Core 6.0 Runtime (v6.0.2) – Windows Hosting bundle. Download and install using this link.
Internet Information Services and .NET Framework #
To enable the Internet Information Services (IIS) and .NET Framework features on the host machine:
Non-Server Operating System #
- Open Control Panel.
- Click Programs.
- Click Turn Windows features on or off. This will open a new window with a list of Windows features.
- Select the following items:
- .NET Framework 3.5
- .NET Framework 4.6 Advanced Services (or any version available):
- ASP.NET (any version available)
- WCF Services
- Internet Information Services
- Web Management Tools:
- IIS 6 Management Compatibility
- IIS Management Console
- IIS Management Services
- World Wide Web Services:
- All features under Application Development
- All features under Common HTTP Features except WebDAV Diagnostics
- Health and Diagnostics:
- HTTP Logging
- Performance Issues:
- Static Content Compression
- Security:
- Request Filtering
- Windows Authenticati
- Web Management Tools:
- Internet Information Services Hostable Web Core
- Click OK to save the changes.
Server Type Operating System #
- Open Control Panel.
- Under Programs, click Uninstall a Program.
- Click Turn Windows features on or off. In the Roles and Features wizard, click Next.
- Select Role-based or feature-based installation on the installation type dialog. Click Next.
- Select Select a server from the server pool and choose the local server host name from the Server Pool list on the destination server dialog. Click Next to see the list of roles.
- Locate Web Server (IIS) and ensure that the following roles are selected
- Web Server (IIS):
- Web Server:
- Common HTTP Features;
- Static Content
- Security:
- Static Content
- Application Development:
- .NET Extensibility 4.x
- ASP.NET 4.x
- ISAPI Extensions
- ISAPI Filters
- Common HTTP Features;
- Web Server:
- Management Tools:
- Web Server (IIS):
- Click Next. This will open a list of additional features
- Select the following items:
- .NET Framework 3.5 Features:
- .NET Framework 3.5
- HTTP Activation
- .NET Framework 4.5 Feature (or any version available):
- .NET Framework 4.5
- ASP.NET
- IIS Hostable Web Core
- .NET Framework 3.5 Features:
- Click Install.
Client Requirements (Windows) #
Hardware Requirements #
| Hardware | Minimum | Recommended |
|---|---|---|
| RAM | 1GB | 2GB |
| Disk | 5GB | 10GB |
| CPU | 1GHz | 3GHz |
| Cores | 1 | 2 |
Software Requirements #
| Operating System | Version | Architecture/s |
|---|---|---|
| Windows Server | 2008 R2 Service Pack 1 or later | x64 |
| Windows 7 | 7 Service Pack 1 or late | x64 |
| Windows 8 | 8.1 or later | x64 |
| Windows 10 | Version 1607 or later | x64 |
Getting the Client Installer #
Download the Open iT CLIMS Client software installer:
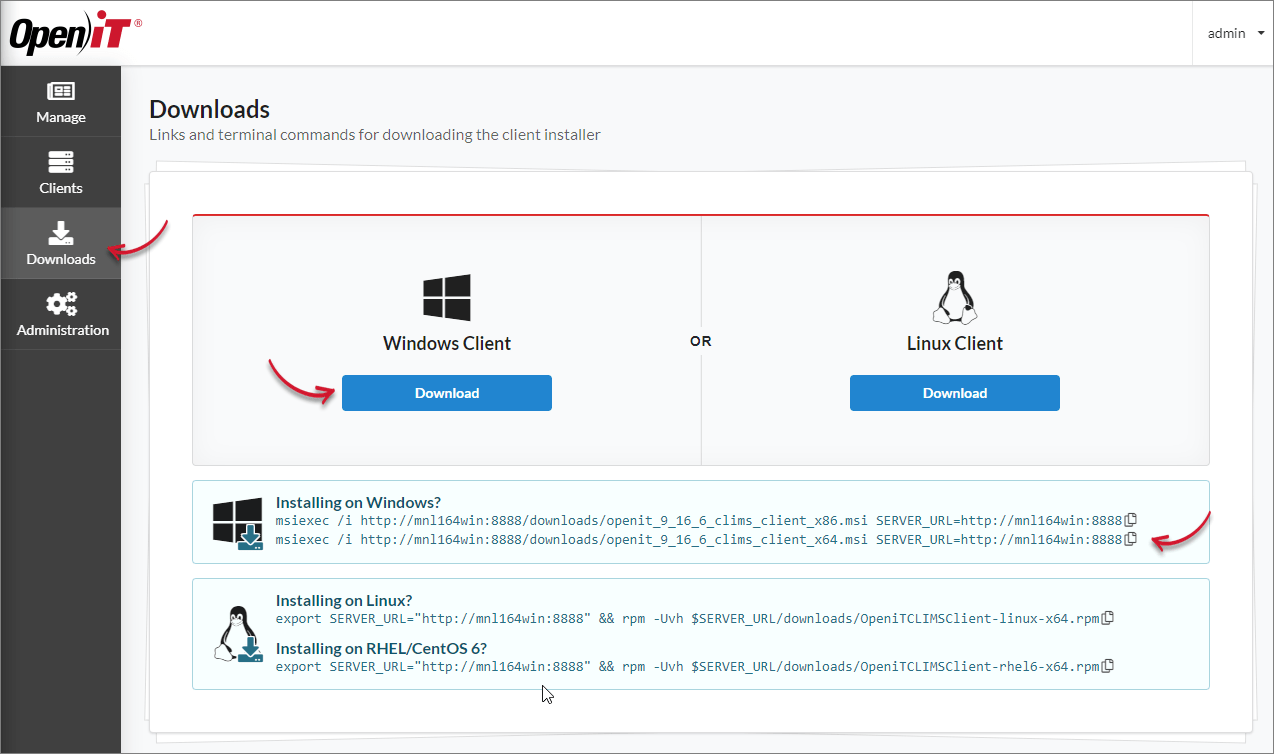
Through the CLIMS Web Interface #
- On the machine where the client will be installed, open a browser and go to the CLIMS interface: http(s)://clims_server_hostname:port
- Once connected, navigate to the Downloads page and click Download under the Windows logo.
- The installer will be downloaded. Use this to install the Open iT CLIMS Client.
Through the Command Line #
- On the machine where the client will be installed, open a command prompt as an Administrator.
- Run the provided commands found in the Downloads page of the server web interface according to the machine architecture (32 or 64 bit).
msiexec /i http://server_hostname:portnumber /downloads/openit_version_clims_client_arch.msi SERVER_URL=http://server_hostname:portnumber - Wait for the command prompt to finish downloading the installer.
The installer will run automatically once it is downloaded.
Client Requirements (Unix) #
Hardware Requirements #
| Hardware | Minimum | Recommended |
|---|---|---|
| RAM | 1GB | 2GB |
| Disk | 5GB | 10GB |
| CPU | 1GHz | 3GHz |
| Cores | 1 | 2 |
Software Requirements #
| Operating System | Version | Architecture/s |
|---|---|---|
| CentOS | 6 and later | x64 |
| Oracle Linux | 6 and later | x64 |
| Red Hat Enterprise Linux (RHEL) | 6 and later | x64 |
Getting the Client Installer #
Download the Open iT CLIMS Client software installer:
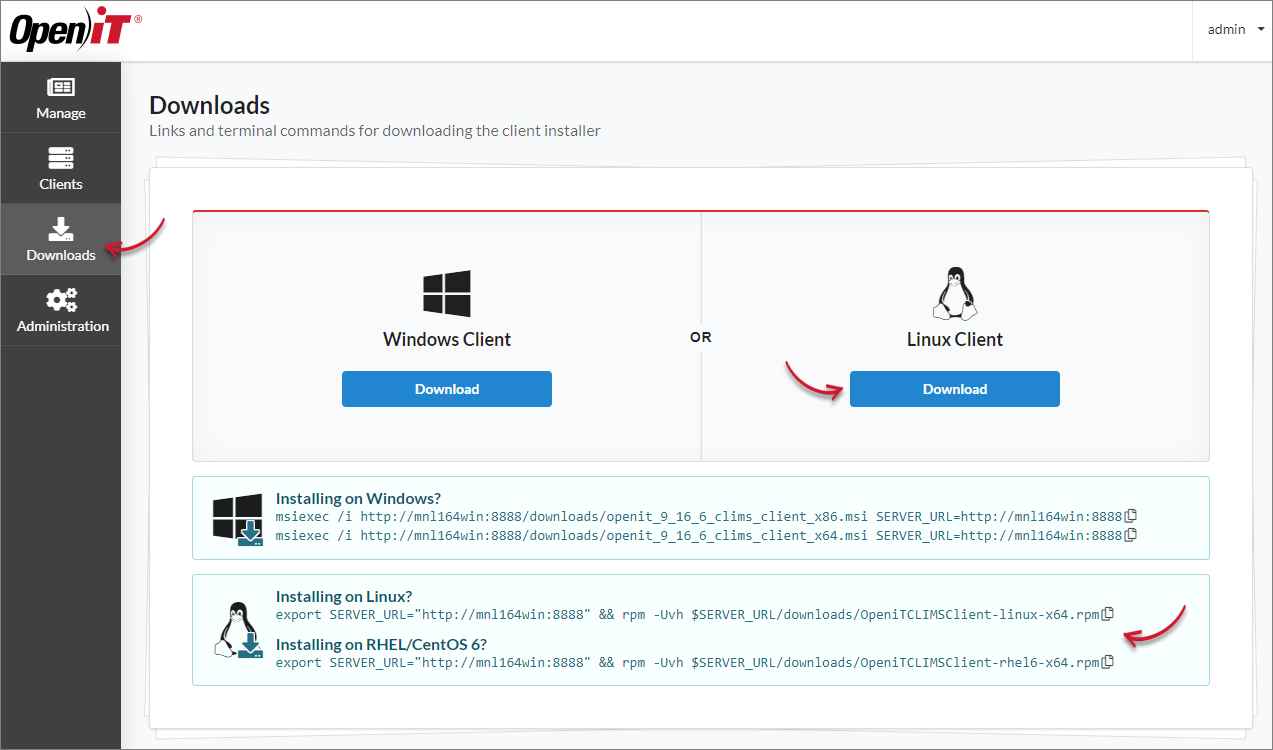
Through the CLIMS Web Interface #
- On the machine where the client will be installed, open a browser and go to the CLIMS web interface:http(s)://clims_server_hostname:port
- Once connected, navigate to the Downloads page and click Download under the Linux logo.
- The installer will be downloaded. Use this to install the Open iT CLIMS Client on Unix.
Through the Terminal #
- On the machine where the client will be installed, run the commands provided in the Downloads page of the server web interface according to the Linux version of the machine.
export SERVER_URL="http://server_hostname:portnumber" && rpm -Uvh $SERVER_URL/downloads/OpeniTCLIMSClient-linux_version-arch.rpm - Wait for the command prompt to finish downloading the installer.
The installer will run automatically once it is downloaded.
Server Installation #
Software Installation #
Installing through the Windows Installer Interface #
Before installing, make sure there is no other installation in progress.
-
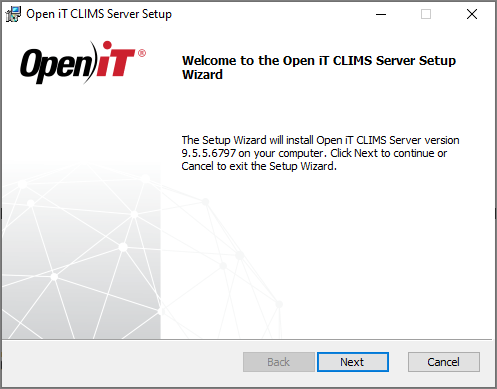
- Double-click the openit__clims_server_x64.msi file to start the installation.
A setup wizard will be displayed. Click Next.

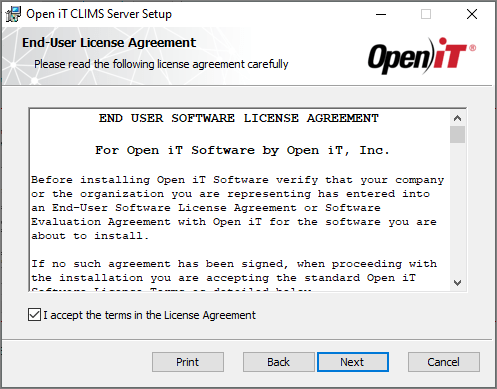
- Read the License Agreement carefully before accepting the terms. Click Next to continue.
- Use the default drive or specify the desired directory. Click Change and specify new directories; otherwise, click Next.
- Provide the TCP port number or leave the default value, 8888, as is. Click Next to continue
- Click Install to start the installation process. If a review of the entries is needed, click Back.
- The installer will set up all necessary files on the computer. Click Finish after complete installation.
- Double-click the openit__clims_server_x64.msi file to start the installation.
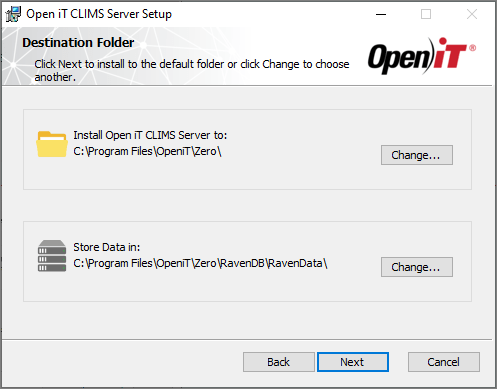
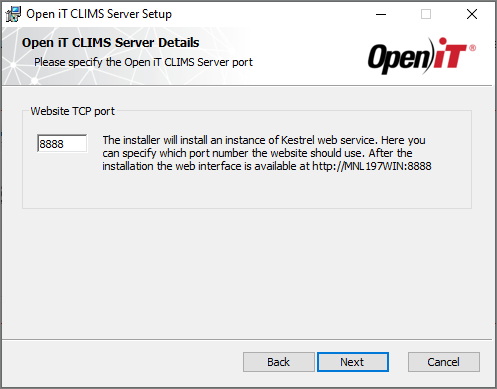
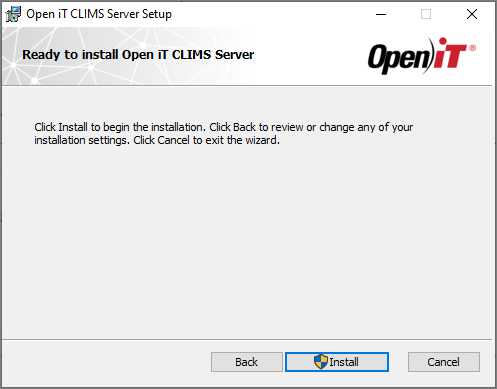
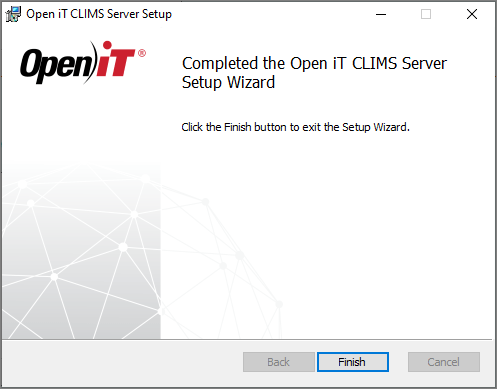
Note: Users who installed the CLIMS Server will have their Active Directory details added to the Administrators List.
Software Installation Verification #
Verify Created Directories and Files #
Go to the $ROOT_DIR of the installation located, by default, in C:¥Program Files¥OpeniT¥Zero and verify that the following directories and files exist:
- Auth – contains files used for authentication
- ClientApp – contains CLIMS client installers for downloading
- Configuration – contains JSON files used for configuration
- RavenDB – contains the database
- appsettings.json – contains application settings for web access and authentication
- web.config – contains specific configuration for web service
- Other DLL files
Go to the $DATA_DIR of the installation located by default, in C:¥ProgramData¥OpeniT¥Zero and verify that the following directories exist:
- Log – contains log files for troubleshooting purposes
- Temp – contains folders to store temporary files
Note: The installation locations specified are the default installation directories and may change depending on whether a custom directory was selected.
Verify Running Services #
The RavenDB service should be running upon installation. To check, open the Task Manager and locate the said service in the Services tab.
Verify Web Site #
To launch a configured application for a specific project:
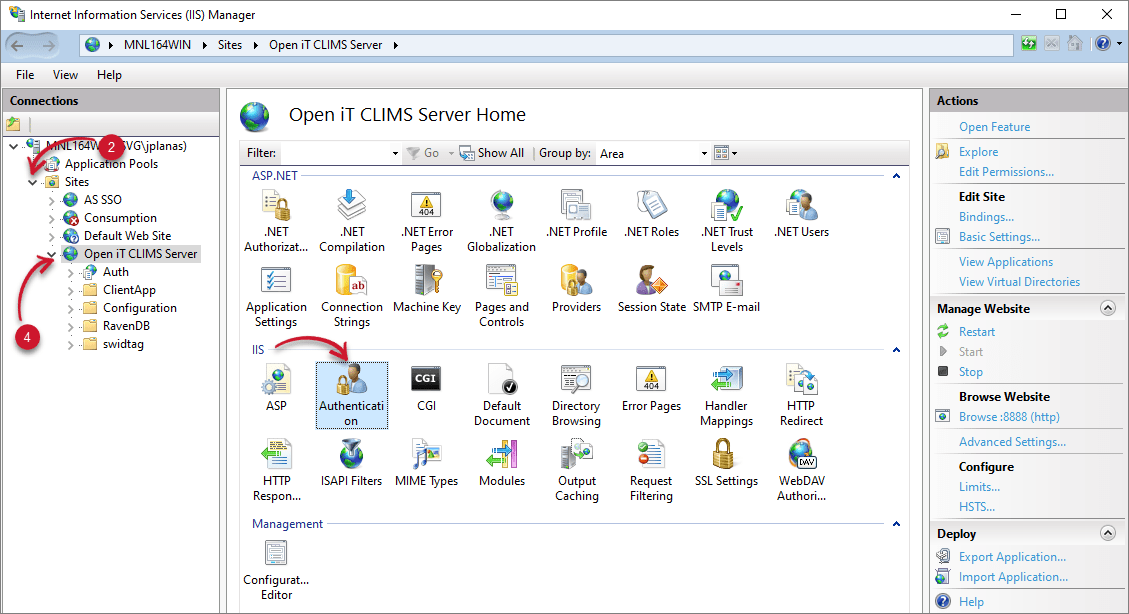
- Open IIS (Internet Information Services) in the machine with the Open iT CLIMS Server.
- In the Connections pane, expand the root node and Sites.
- Make sure that the Open iT CLIMS Server is present.
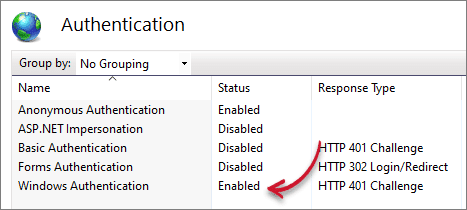
- Click the Open iT CLIMS Server website, and in the dashboard, double-click Authentication.


Verify Web Application #
Check if the web page is working properly by opening http://: on a browser. The default credentials are as follow:
- Username – admin
- Password – admin